Besides the .NET SDK for developers used to the Microsoft stack, the team has also released an Android SDK. Like the REST APIs it is based on, the Android SDK is also in preview.
Let's look at how to set up the Office 365 SDK for Android development. I'm going to assume you're using Eclipse ADT.
1. Head over to the GitHub repository and download the SDK. You can either Download ZIP or Clone in Desktop.

2. In Eclipse, go to File > Import > Existing Android Code into Workspace. Browse to the location where you cloned the SDK, or where you unzipped the files that you downloaded. Select all the Android projects except the Test projects.
3. You'll see a bunch of scary-looking exclamation marks and import errors after you've imported the Office 365 SDK android projects. Let's find out what's causing these import errors and try to solve them one-by-one.


4. The reference to the Azure Active Directory Library is broken. The Office 365 Android SDK requires this library for authentication using Active Directory. This allows users whose organizations subscribe to Office 365 to sign in with their organizational accounts (e.g. "abc@xyz.com").

Let's fix it by selecting the ADAL library project in our current workspace. If you haven't yet configured and imported the ADAL, I've written a step-by-step guide on how to do that here.
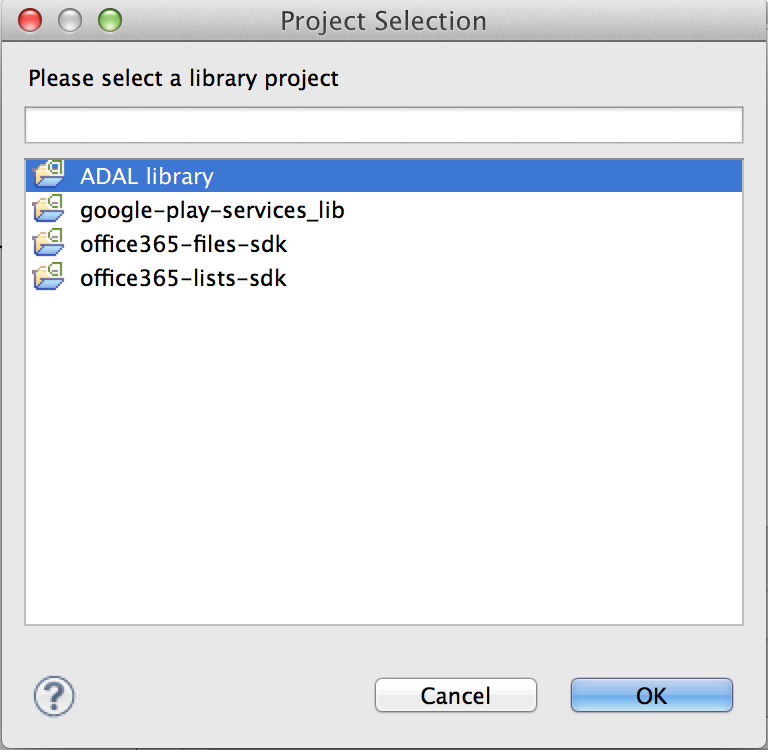
Do this for all the projects, since all of them have references to ADAL.
Tip: When you're trying to fix errors that come with importing a new project into Eclipse, I'd highly recommend that you regularly clean the project you are trying to import. Many times I thought I'd already fixed something but the warning message still shows, and I realized it's because I forgot to clean and recompile the project. Clean the project by going to Project > Clean in the menu bar in Eclipse.


Let's just grab it off the Guava library page.


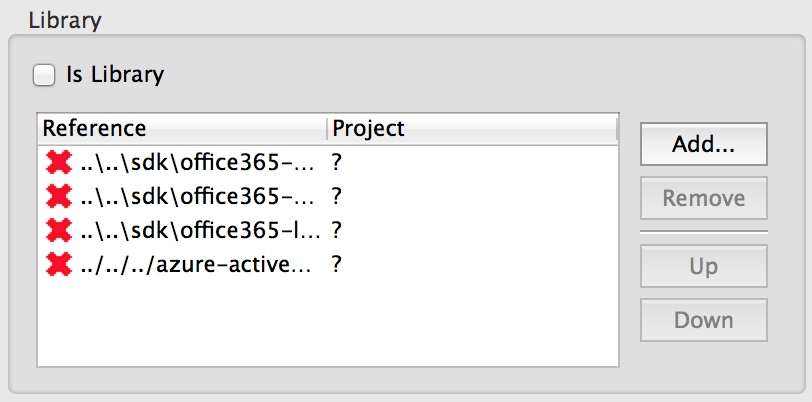
It seems that some of them have incorrect references to the Office 365 base/files/lists SDK. Fix them by removing the references to the libraries, and adding them in again (this error occurred because the path is no longer the same after you import the SDKs into Eclipse).
7. If you still get errors, especially in the import statements, add in "aad" before ".adal" as shown below. This is because the path you import from must correspond to the name of the package in Eclipse (you can open the package of the Azure AD library to see its name and make sure it corresponds)
That's it - you should be good to go! In a future post I will aim to cover how to run the samples and what they do.
No comments:
Post a Comment